
SMOK mods can be complex, especially for beginners. To simplify things, we have created a comprehensive guide that breaks down all the settings you’ll find inside your SMOK mod. This guide aims to help you understand how everything works and fits together, providing you with a better understanding of your device.
If you own a SMOK mod from the past two years, the information provided in this guide should be applicable to your device. It’s important to use high-quality vape juice, as it will enhance the performance of your vape tank and prevent coil buildup caused by cheaper e-liquids.
SMOK occasionally releases firmware updates, but these usually don’t significantly alter the user experience or functionality of the mod’s menus and settings. Firmware updates generally focus on providing more power and resolving known issues.
Please note that this guide is primarily intended for beginner vapers. If you’re already familiar with SMOK mods or have advanced vaping experience, some of the following information may be basic to you. However, the aim is to provide a complete overview of the mod’s functions, covering both the fundamental features and more advanced capabilities.
Let’s do this.
How To Use SMOK Vape Mods: How To Turn It On
Most recent SMOK mods feature a fire bar instead of a single fire button. This fire bar offers a convenient method for firing your mod, as it requires minimal precision and can be easily activated without looking at it. The motion of using the fire bar is more intuitive and natural.
To activate your SMOK mod, simply unbox it and insert the batteries correctly. Then, click the fire bar five times to wake up the mod. After a brief boot-up time displaying the SMOK logo, the settings menu will appear on the mod’s display.
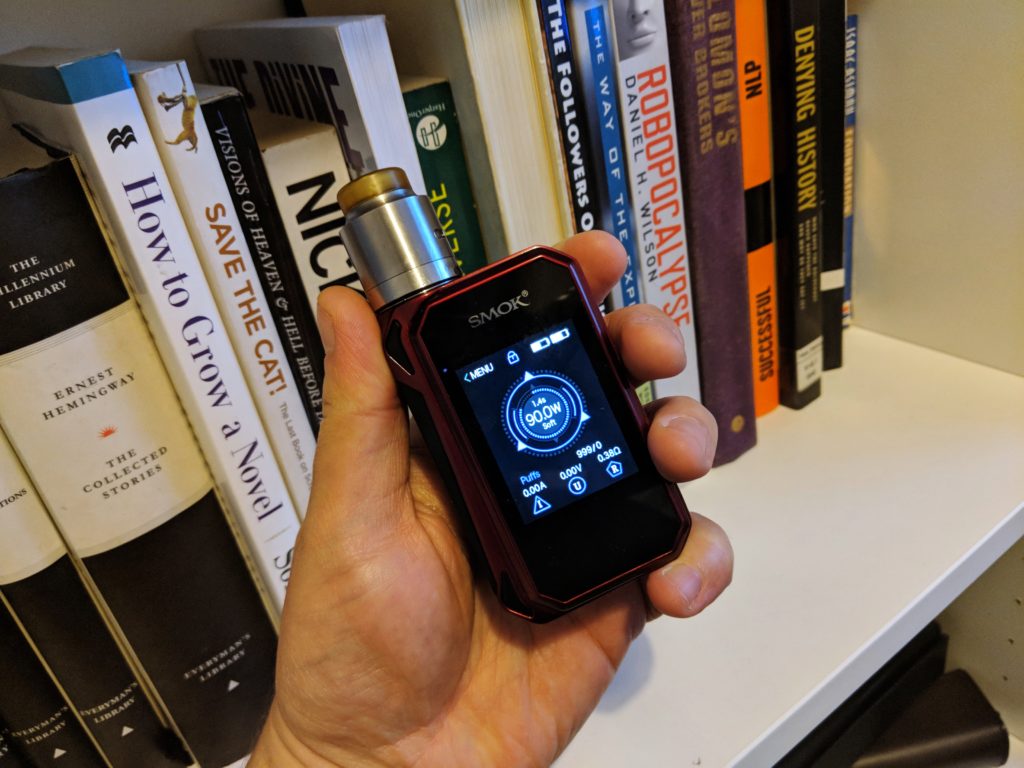
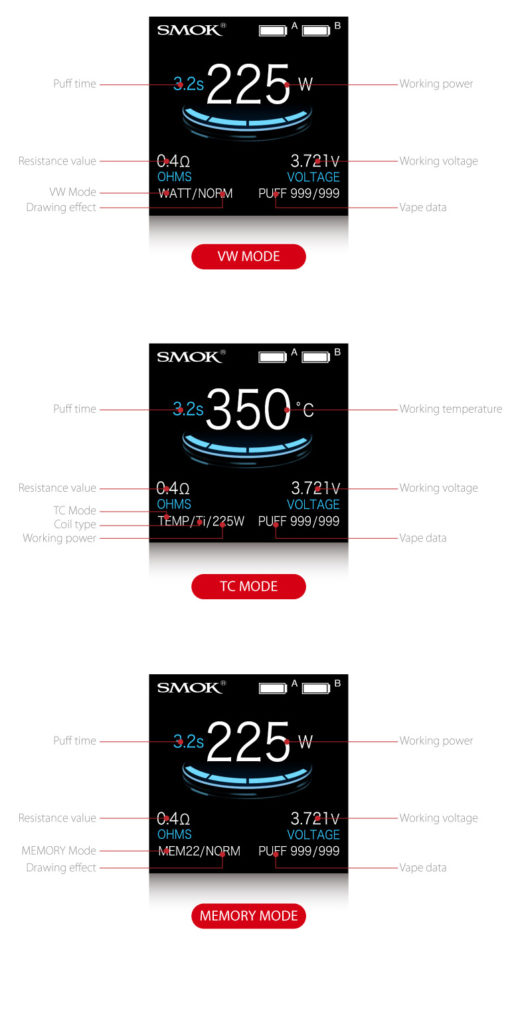
How To Use SMOK Mods: Exploring The Display
Using SMOK mods involves exploring the information displayed on the screen. SMOK provides a comprehensive display that shows various readings and data. This includes wattage and temperature control (TC) readings, dual-battery status, Ohms reading, voltage, and even a puff counter to track your daily vaping usage.
When using a SMOK sub-ohm tank, it’s important to ensure that the tank’s resistance matches the specifications indicated on the coil. SMOK’s tanks and coils are typically calibrated to ensure compatibility, so you shouldn’t encounter any issues in this regard.
Atomizer Error
Correctly setting up the coil is crucial for avoiding issues with your SMOK mod, especially when using homemade coils. The coil’s resistance is indicated by the Ohms symbol (Ω) on the display, such as 0.18Ω. Homemade coils may have different resistance, which requires additional attention.
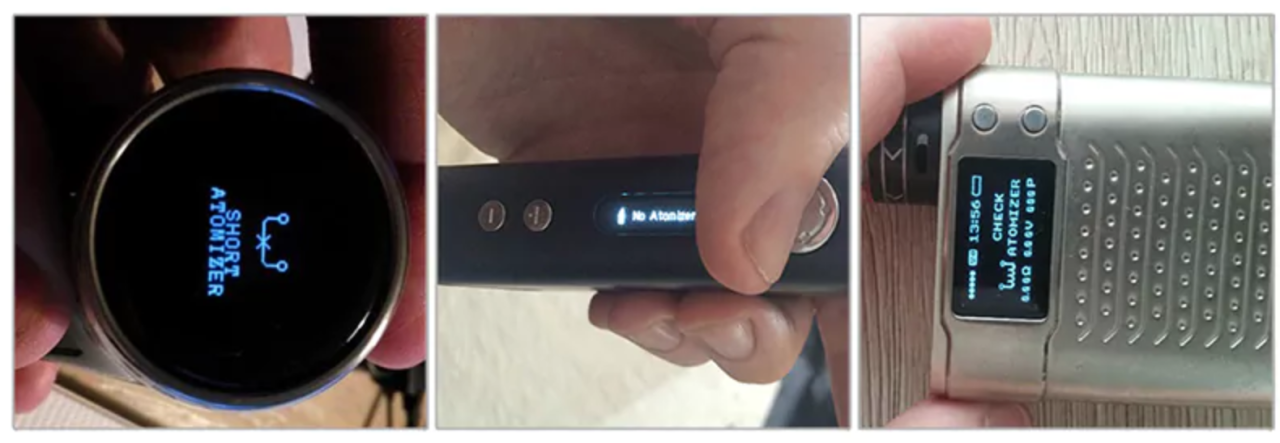
If there are any problems with the coil, its resistance, or the connection, the mod will not fire and may display an error message. In such cases, check the coil, ensure it is properly connected, and verify that the tank is securely attached.
To adjust the wattage or power, use the up and down buttons to find the ideal setting for your tank. It’s important to start with a lower power setting (around 40-50W) and gradually increase it. This allows the coil to prime properly and reduces the risk of burning it out. Starting too high can result in coil damage, which can be costly in the long run. Take it slow and steady to ensure optimal performance.
How To Access Settings
Using a touchscreen SMOK mod? Simply tap the settings icon on the home screen to access the mod’s settings. For non-touch devices, click the fire key three times to enter the Settings Menu.
Within the Settings Menu, navigate through the menus using the UP and DOWN keys on the mod. The first setting you’ll encounter is the MODE SETTING. Here, you can choose different vaping modes for various coil types such as W (wattage), Ti, Ni, SS, and M. You can also adjust the pre-heat feature if desired.
If you prefer a straightforward vaping experience, set the mod to W (wattage) mode and adjust the wattage to your preference. Ti, Ni, and SS modes are specifically for temperature control vaping with coils made from titanium, nickel, and stainless steel, respectively. These modes require specific settings to optimize performance.
If you’re using the SMOK coil that came with your kit and not interested in advanced settings, stick to wattage mode as it is designed for standard power vaping. The other settings become relevant only when temperature control vaping or using different types of wire in your own coil builds.
Moving Around Inside The Menus

In the settings menu, you can quickly navigate through the menus by clicking the fire bar. SMOK mods typically have four main menus:
- Mode Setting: Choose your vaping mode, such as temperature control (TC) or wattage mode.
- Puff Counter: Set a limit on the number of puffs per day (default setting is usually set to NEVER).
- Screen Setting: Customize the font color and LED lights (available on certain mods like the ProCOLOR).
- Power Off: Turn off the mod.
When inside a menu sub-folder, use the adjustment buttons to navigate. To select a setting, hold down the fire key for one second.
EXAMPLE: How To Change The Font Color On A SMOK Mod
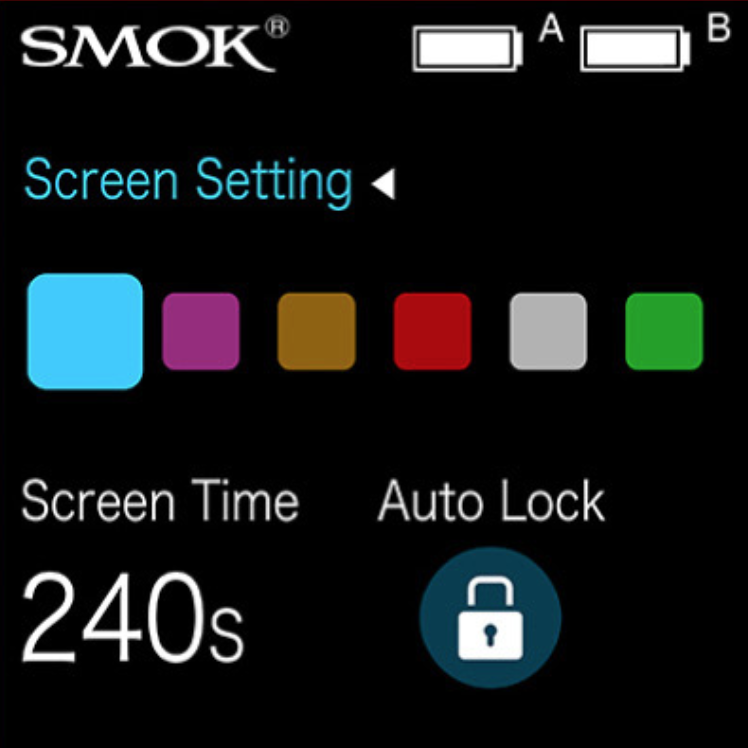
To access the Screen Setting on your SMOK mod:
- From the Home screen, click the fire bar three times.
- Click through the menus until you reach the Screen Setting option.
- Use the mod’s buttons to navigate through the available color options until you find the one you desire.
- Once you have selected your preferred color, hold the fire bar for one second to confirm your choice.
- That’s it! Your screen color setting is now updated.
Remember, this process is applicable throughout the entire operating system of your SMOK mod. Holding the fire bar for one second selects options, quick clicks help you navigate the Settings Menu, and the physical buttons allow you to move through the menu’s sub-folders and options.
Installing A New Coil
When installing a new coil on your tank, especially with an RDA, your SMOK mod will prompt you to select whether it is a new or old coil, displaying two different Ohms readings.
To choose the correct option:
- On a touchscreen SMOK mod, simply tap the NEW option.
- On a non-touchscreen SMOK mod, use quick clicks on the fire bar to toggle between options. Once you have the correct option selected, long-press the fire bar to confirm.
Quick settings to remember
Quickly switch between SOFT, NORMAL, HARD, MAX output settings:
On a non-touchscreen SMOK mod, press the fire bar and the up button simultaneously to cycle through the options.
How to change wattage in TC mode:
Press the fire bar and the up button at the same time.
Adjust the wattage power using the up and down buttons until you reach your desired setting.
To lock in the wattage, press and hold the fire bar for a few seconds.
How to lock/unlock the device:
On a touchscreen SMOK mod, click the fire bar three times to lock the mod and another three times to unlock it.
On a non-touchscreen SMOK mod, simultaneously hold down the two navigation buttons to lock the device, and repeat the same action to unlock it.
How To Upgrade SMOK Mod’s Firmware
To upgrade the firmware on your SMOK mod, follow these steps:
- Install SMOK’s NuMicro ISP Programming Tool on your PC.
- Visit SMOK’s official website and follow their instructions for firmware upgrade.
- Important: Before updating the firmware, remove all batteries from the mod.
- During the firmware upgrade process, on certain models, you may need to press and hold down the firing bar throughout the entire process.


